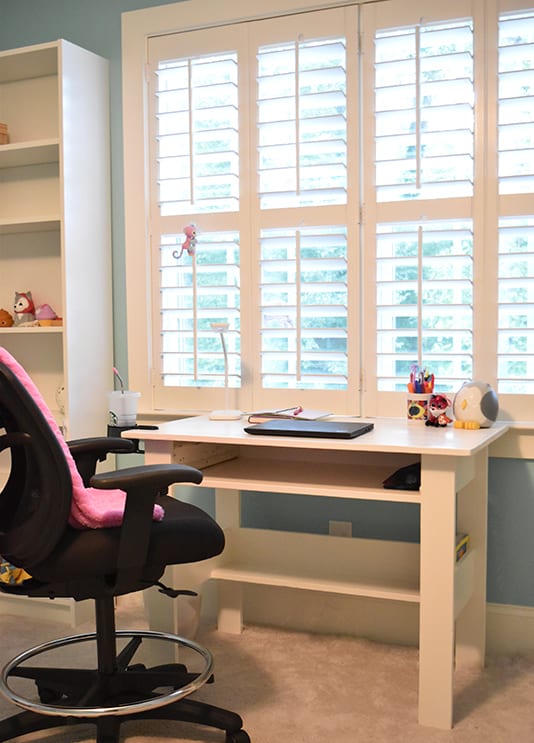
The last few weeks (months) of summer break were a blur. We had way too many projects on our list and so much to do before starting virtual learning. Our DIY homeschool desk was finished in time, but somehow morphed into a full tween room makeover and we didn’t quite finish the whole project by the first day of school. Who am I kidding? We’re still not finished!
But, as promised, I wanted to share our desk plans. Maybe school hasn’t started for you yet, or maybe you’re behind just like us. Either way, no judgement. You’re doing great!
Disclosure: Some of the links on this site are affiliate links, meaning, at no additional cost to you, I will earn a commission if you click through and make a purchase.

Hubby and I brainstormed this desk — then we “Sketched-up,” “masked up” and ran to home improvement store for supplies.
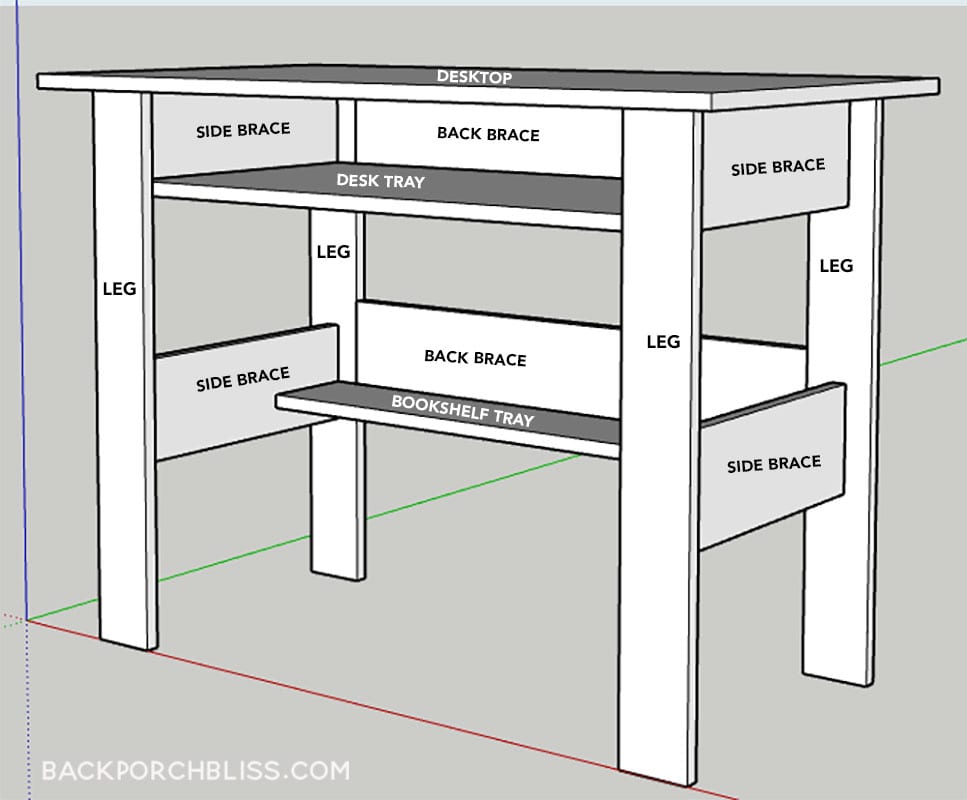
Here’s the sketch:
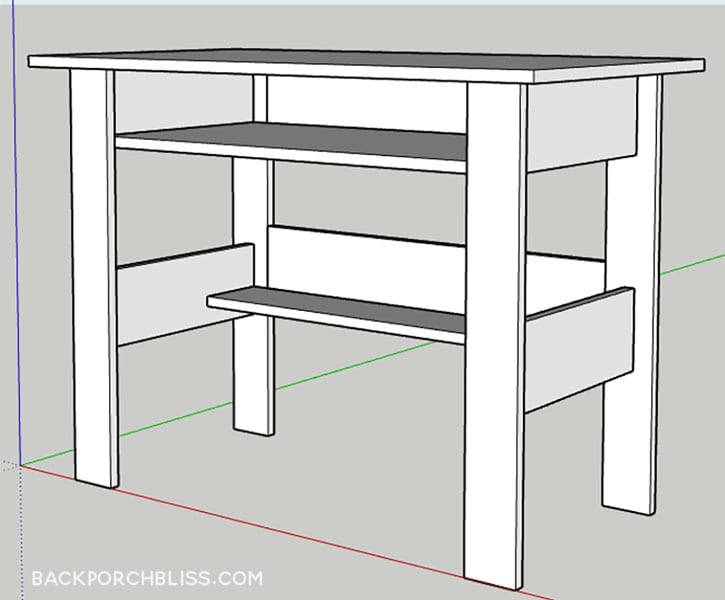
The desk has an open front– we plan to add a drawer later, but if you want to keep it simple, this absolutely works with an open front. Kids can quickly grab their notebooks and supplies while keeping their work surface clear. It also has a book shelf along the bottom for additional storage.
Here’s what you need:
- (4) Side Braces – 1×6 – 16 ½ inches
- (2) Back Braces – 1×6 – 29 inches
- (4) Legs – 1×4 – 29 ¼ inches
- (1) Bookshelf Tray – 1×6 – 31 ¾ inches
- (4) 1×6 – 40 inches (for desktop; overall dimensions are 40×22)
- (4) 1×6 – 31 3/4 inches (for desk tray; overall dimensions are 31 3/4 x 16 1/2)
- Wood Glue
- Kreg Jig
- 1 ¼ inch Kreg Jig Pocket Joint Screws
- Primer/Paint & Brush
- Polyurethane, Clear Satin or Matte
- Rock Hard Putty
- Countersink Bit– used to attach desktop to frame
Ready? Let’s get started!
- Measure and cut all your pieces. As my dad used to say, “Measure twice and cut once!”


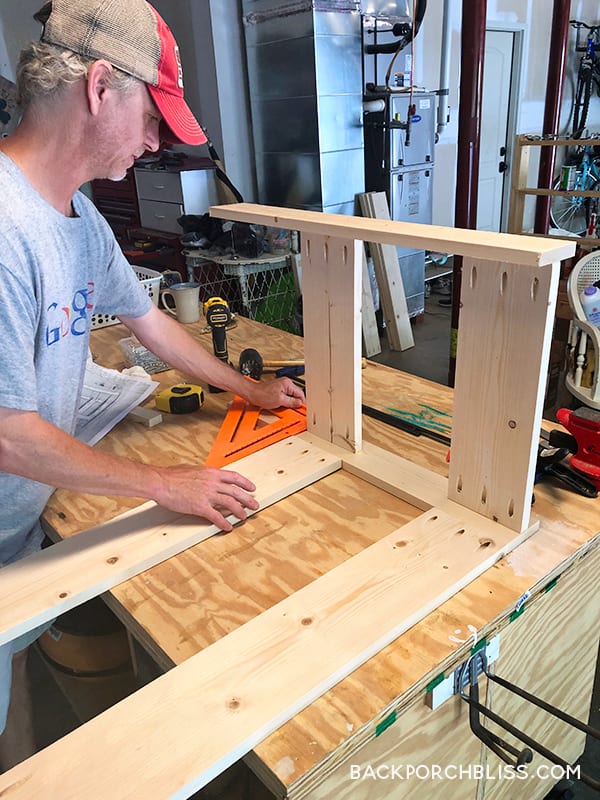
2. Assemble the legs. Place support braces in the middle of each leg and attach with pocket hole screws and glue. Attach the top brace to the top of the leg; attach the middle brace 8 ¾ inches below the top brace.
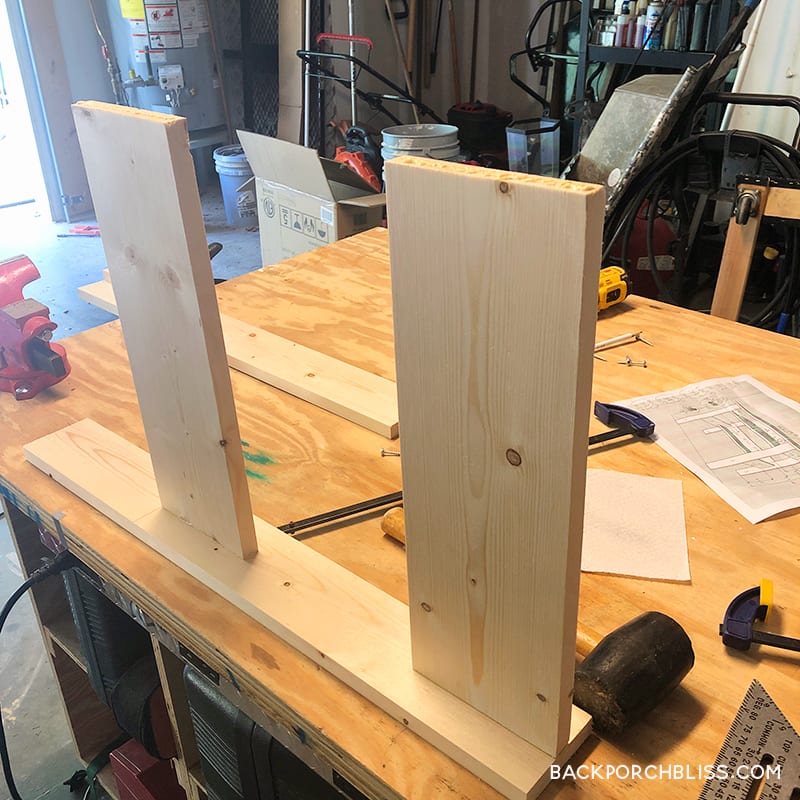
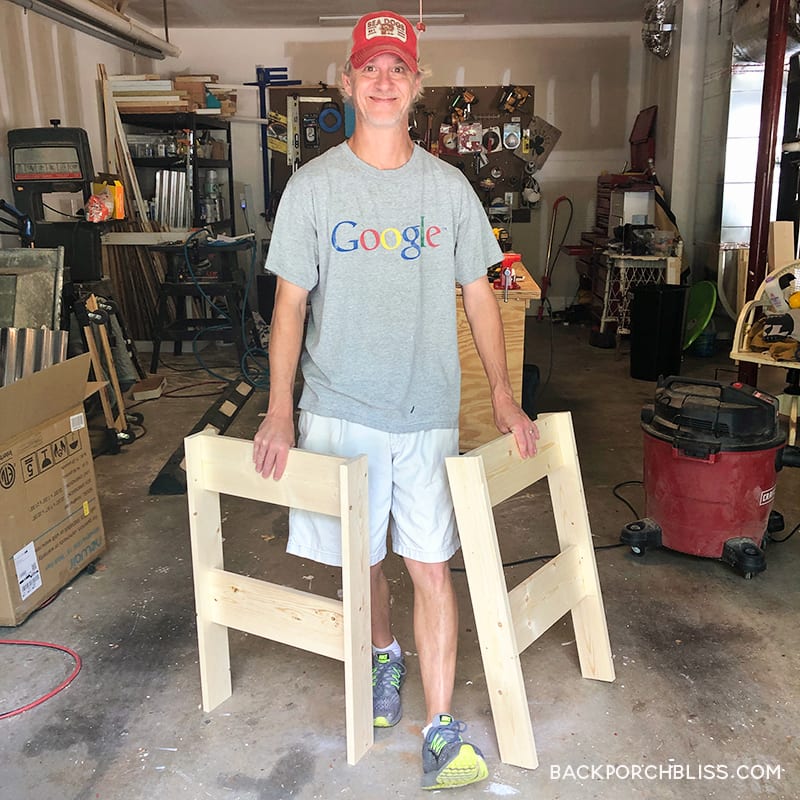
3. Attach back braces to both legs with pocket hole screws and glue. Attach the top brace to the top of the legs and attach the second brace 7 ¼ inches below the top brace.
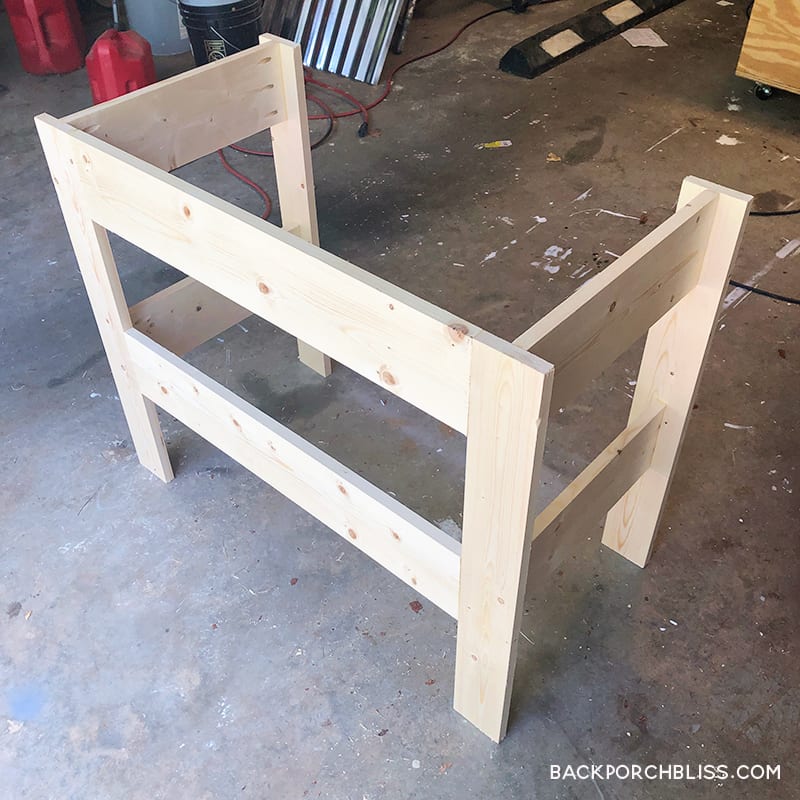
4. Use pocket hole screws and glue to attach the desktop tray to the leg frames and the middle back brace. Position at the bottom of the lower back brace.
5. Assemble the desk tray together by joining the the (4) 1x6s cut at 31 3/4 inches wide with pocket holes and glue.
6. Attach the desk tray to the leg frames and bottom of the top back brace with pocket hole screws and glue.
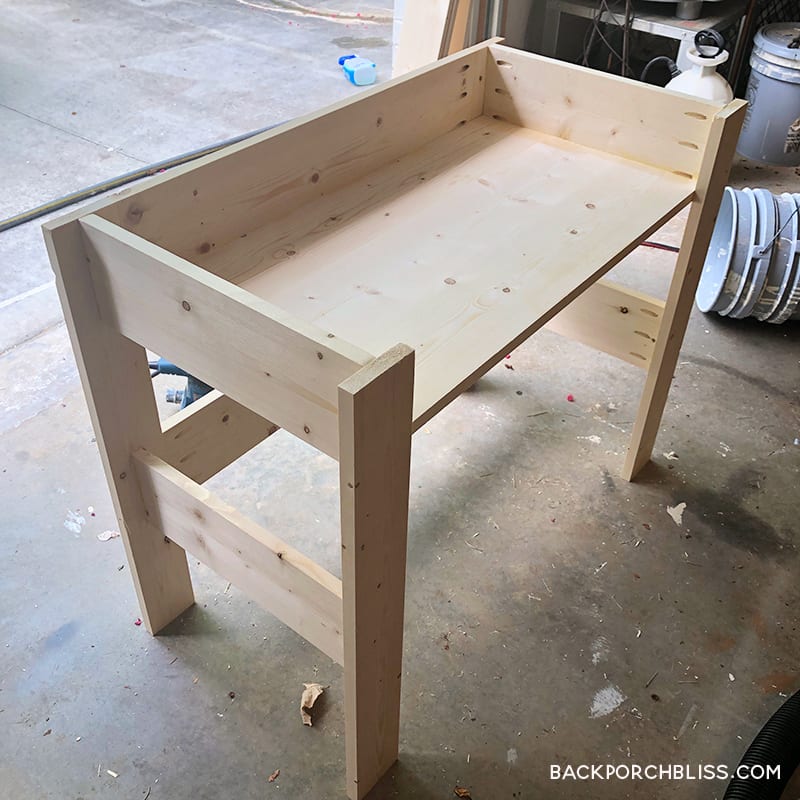
7. Attach the book shelf tray (1) 1×6 cut 31 3/4 inches to leg frames and bottom back brace. The tray is positioned at the bottom of the lower back brace (see diagram above).
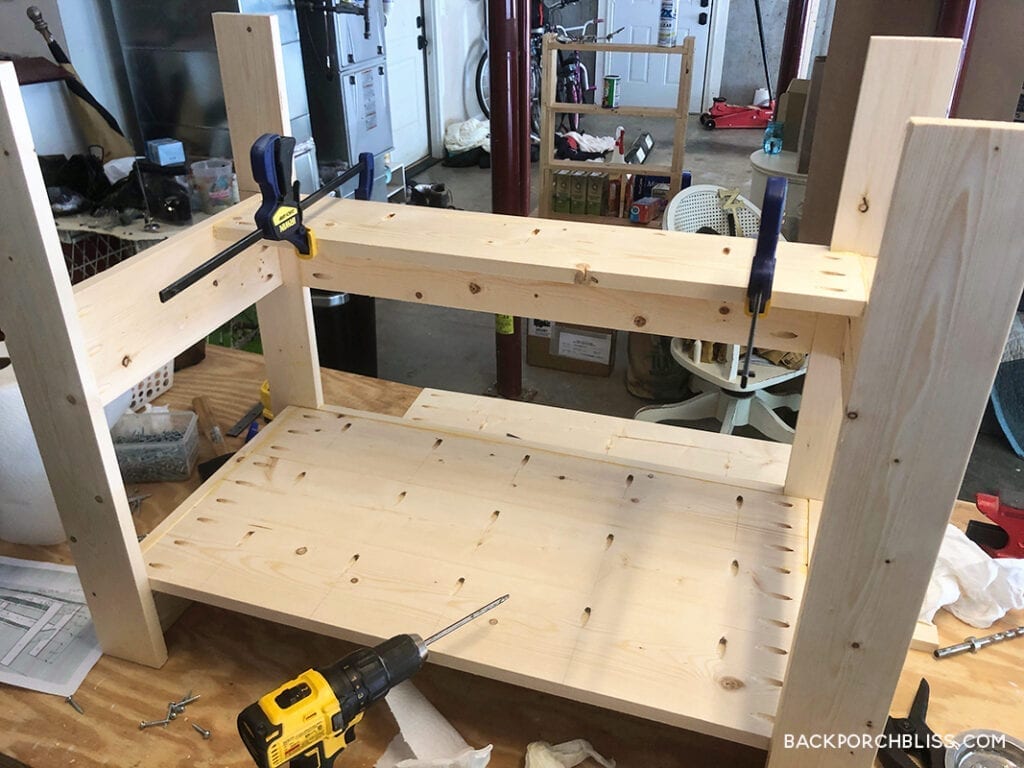
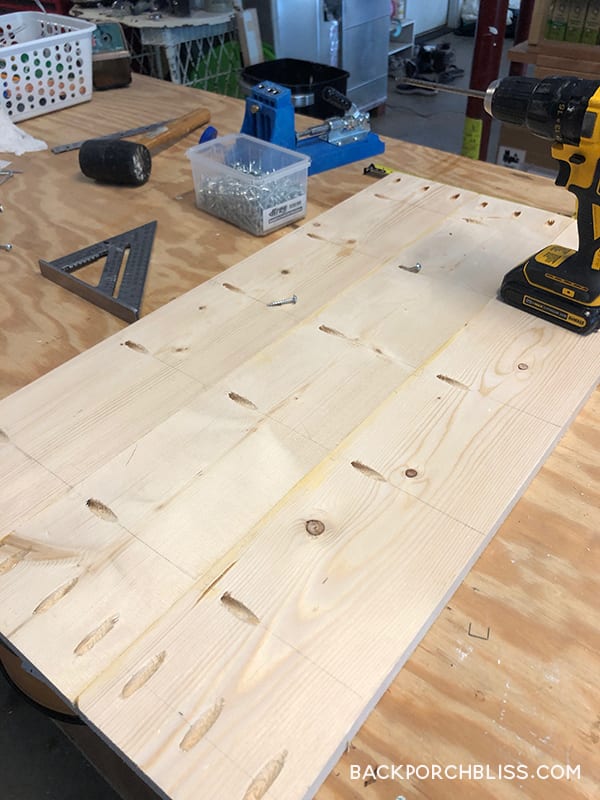
8. Assemble the desktop by attaching the (4) 1x6s cut at 40 inches wide together with pocket holes and glue.
9. Before attaching the desktop to the desk, fill all pocket holes using Rock Hard Putty.
10. Sand the desk and desktop.
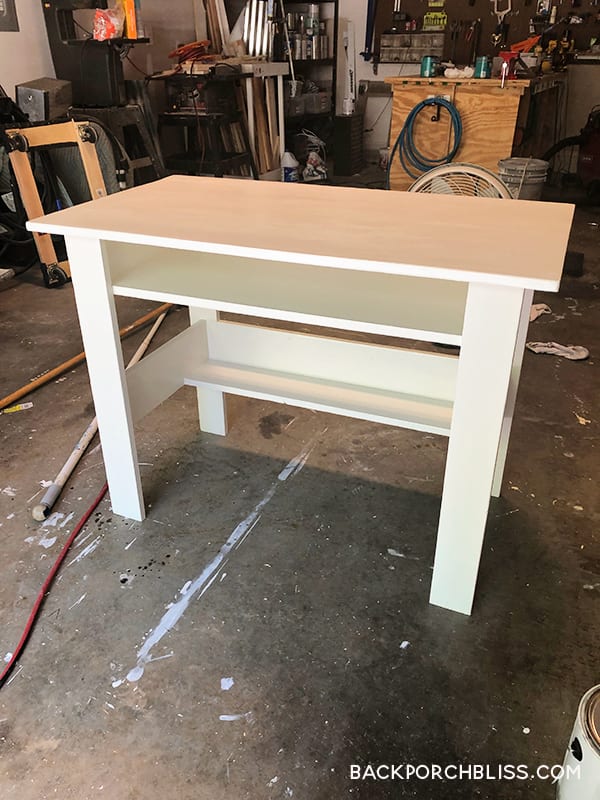
11. Desk Body: prime, paint, and polyurethane (3 times).
12. Desktop Bottom Surface: prime, paint and polyurethane (3 times).
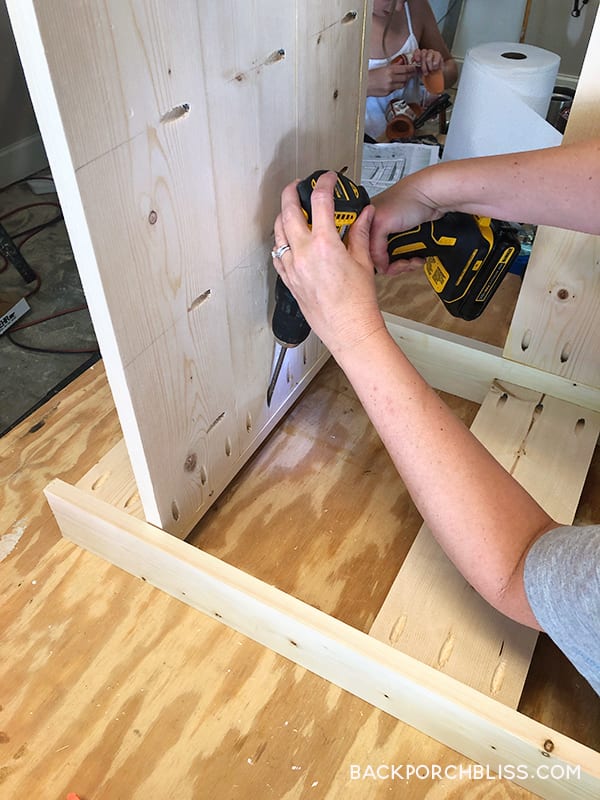
13. Attach the desktop to the top of the desk. Countersink holes using 1 ¼ inch pocket hole screws.
14. Fill countersink holes with Rock Hard Putty, let dry.
15. Desktop Upper Surface: Sand, prime, paint, and polyurethane (4-5 coats).
We’ve been shopping desk accessories, check our finds:
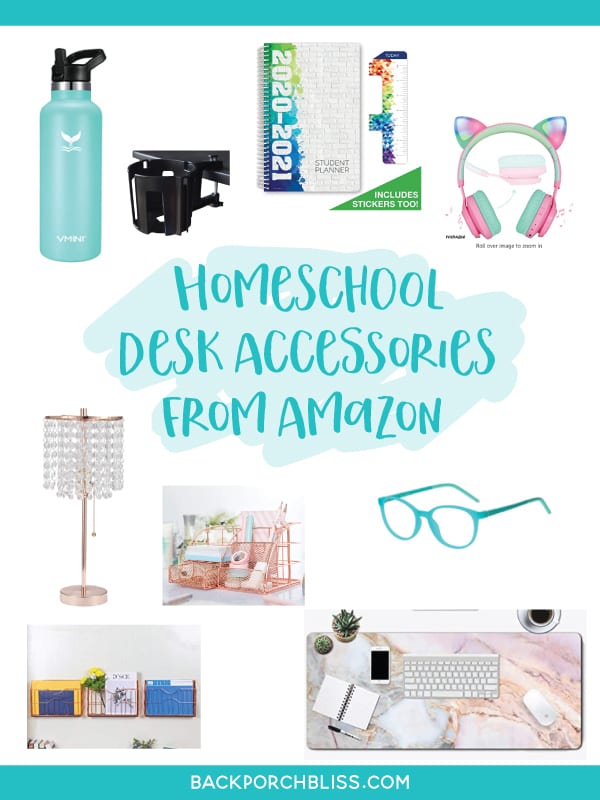
Rose Gold Desk Organizer | Rose Gold Vertical File | Marble Desk Pad | Student Day Planner | Clip on Cup holder for Desk | Blue Light Blocking Glasses for Kids | Bluetooth Headphones with Microphone | Colorful Stainless Steel Water Bottle
If you make our homeschool desk, we’d love to see how your project turns out! Tag #backporchbliss on Instagram.
Happy learning!

You GO FRIEND!!!!!!!!!!
What an amazing project!
That desk is incredible!
KariAnne
Thank you so much, KariAnne!
What a great desk! Love that your daughter got in on the construction too. You’ve made her a fantastic space for virtual learning this year and homework in future years to come!
Thanks so much, Anne! I appreciate your kind words. We’ve had the best time working on this together. 🙂
What a fantastic project. Love it when kids get involved too.
Thank you so much, Carol! We love doing projects that involve the kids.
Wow! This is a great project to complete! Love the desk.
Thanks so much, Jennifer!
I’m in awe of people who build things from scratch. Such a wonderful desk!
Aww, thank you Linda! We had a good time building the desk.
What a great desk. I love how simple it is and that it does not take up alot of floor space. Yet very functional.
Thanks so much, Renee! It’s a great fit for us. The good thing about custom is you can make it whatever size works for the space.
This is a fantastic desk! I’d use it for me! So needed in this time!
The steps are so clear & concise. Great tutorial. Desk turned out so good!
Thank you so much, Marie. I’m glad it was helpful!
Very cool! And simple! I love it
Thank you, Christin!
This desk looks awesome and so clean lined and modern. Love it! Thanks for sharing.
Thanks so much, Donna!